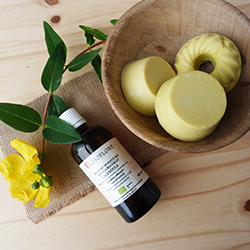
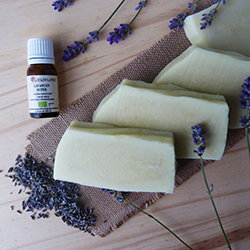
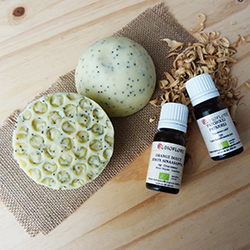
Making your own natural soaps

Making your own natural soaps

How about making your own natural soaps at home?

Cold saponification is an ancient method of making all-natural soaps with three basic ingredients: water, vegetable oils and caustic soda. This method preserves the quality of the vegetable oils and retains all the glycerine from the saponification process, for nourishing and moisturising soaps. An ecological, economical, easy and pleasant method that also limits packaging in the bathroom. To get started, follow the guide!

Cold saponification

Cold saponification Soap is the product of saponification: a chemical reaction that occurs when an oily substance (vegetable oil, vegetable butter, wax) is mixed with a solution of soda or potash dissolved in water, called a "base". Under the effect of the heat generated by the chemical reaction and the mixing, the fatty acids and the base combine to form soap and glycerine. Cold saponification is an ancestral method that makes it easy to produce soap at home or in a traditional way, using simple, local ingredients if possible and in an economical way.

Preliminary precautions

To make your own natural soaps, you will have to handle caustic soda, which requires that you follow safety instructions. Highly corrosive, lye can cause serious burns if it comes into contact with the skin.

To make your soaps safely, follow these rules:

  • Wear protective glasses, protective gloves, closed clothing (long sleeves, trousers, closed shoes)
  • Never use aluminium equipment as soda corrodes this type of material. Prefer stainless steel, glass or heat-resistant plastic utensils
  • do not allow children or pets into the room where you make your soaps
  • store your caustic soda in a childproof and secure area
  • always pour the soda into the water, never the other way round as this can cause splashes
  • when pouring soda into water, always do so in a well-ventilated room or, better still, outside if possible
  • wear a mask and goggles to protect yourself from the fumes caused by the dissolution of soda in water
  • if lye comes into contact with skin or eyes, flush with water and call a doctor urgently/ if you accidentally ingest lye, drink some water and call a poison control centre and/or emergency room

The necessary material

The first time you embark on the adventure of creating your own soaps, you will have to invest in a little bit of equipment, but you will see that the investment will quickly pay for itself as you use it!

To create your soaps you will need:

  • a stainless steel pan with a capacity of at least 2L
  • a large stainless steel spoon or whisk
  • an electric immersion blender
  • a heat-resistant measuring jug
  • 2 kitchen or cosmetic thermometers
  • 2 containers with spout in glass or plastic
  • a precision scale cling film
  • an ice cube tray
  • an apron protective gloves (such as dishwashing gloves)
  • protective glasses
  • a protective mask
  • tea towels towels to cover your soap once it is in the mould
  • a ladle
  • one or more soap moulds (anything is possible: cake moulds lined with baking paper, silicone kitchen moulds, home-made wooden moulds... be inventive and recycle!)
  • a good knife to cut your soap

The basic ingredients

  • caustic soda
  • vegetable oils and butters: we advise you to mix between "precious" oils in small quantities and more common and/or local oils for an economical soap. Think also of vegetable butters such as shea butter or cocoa butter. Beeswax is also an ingredient of choice for soap making!
  • essential oils to perfume your soaps and bring their benefits to the skin. They should be used between 2 and 5% of the total weight of the vegetable oils, giving preference to essential oils that are gentle on the skin and non-irritating.

But also: clays, fresh plant and/or fruit juices, vegetable powders, dried flowers, honey etc...

Let's go : Making natural soap by cold saponification, step by step (two methods)

The instructions below follow all the steps in making cold process soap, refer to the recipes at the bottom of the file for the ingredients.

Make sure you work on a clean and clear work surface, with all the materials you need to make your soap out, and prepare your soap mould(s) before you start.

Method 1:

  1. Put on your gloves, goggles and apron, weigh the water in a measuring jug and place a stainless steel soup spoon in it.
  2. Weigh the soda in a glass or plastic container with a spout.
  3. In a well-ventilated area or outside, slowly pour the soda into the water, stirring gently without stopping, until it is completely dissolved. This mixture will produce vapours for a few minutes and then start to heat up to 70°C-90°C. Place your thermometer in the container to monitor the temperature.
  4. While your soda solution is cooling, weigh out your oils, vegetable butters and beeswax, starting with the solid fats. Heat them very gently to melt them and remove them from the heat before they are completely melted.
  5. Weigh the liquid oils and pour them into the same pan as the solid fats, mixing well with a whisk. Place a thermometer in your oil mixture.
  6. While waiting for your soda solution and your oil preparation to cool, weigh the other ingredients of your recipe if necessary (essential oils, plant powders, clays).
  7. When your two mixtures (soda+water and oils+butters) reach the same temperature (between 40? and 45?C), slowly pour the soda solution into the saucepan while whisking for 5 minutes, then use the hand blender, blending for about 5 seconds, every 30 seconds. Between intervals, continue to stir your mixture with the hand blender, as if it were a spoon.
  8. Soon the trail will appear... ! Blend, stop regularly, lift your blender and observe your preparation. A thin stream will run from the end of your mixer: if a bead appears in relief on the surface of your preparation and remains visible, this is the trace, which indicates that the saponification reaction has taken place!
  9. As soon as the trace appears, don't hang around because your mixture will thicken and become very pasty. This is the time to add any essential oils or other ingredients.
  10. Once all the ingredients have been added and the mixture homogenised, pour your dough into its mould or moulds.
  11. Cover the surface of your soap with cling film. To avoid small whitish deposits on the surface of your soap when it dries, you can spray a little 60° or 70° alcohol on the surface of your preparation before applying the cling film.
  12. Wrap your mould in a towel to insulate it until you are ready to unmould.
  13. If you lift your towel, you will see a sort of gel appear on the surface of your preparation, this is normal! This is the final phase of cold saponification.
  14. 24H later, remove your soap from the mould, making sure you wear gloves and if necessary, depending on the mould you have chosen, cut your soap into bars.
  15. You have reached the drying phase! Your soaps will now dry for at least a month in a dry, well-ventilated place away from light. Ideally, dry your soap on a rack so that it is well ventilated. Avoid aluminium surfaces.
  16. When your soaps are ready, store them away from humidity and light, in wooden or cardboard boxes that allow the soaps to "breathe".

Method 2:

This method is similar to the first one, the only difference is the water, with a trick to make the soda+water solution cool down faster and the two mixtures reach the same temperature faster.

  1. Put on your gloves, goggles and apron.
  2. Weigh the water in a measuring jug: pour half of the preparation into an ice cube tray and wait for the ice cubes to set.
  3. Weigh your fats and then melt the vegetable butters, waxes and oils in your recipe in a bain-marie. Mix them and remove them from the heat as soon as they are melted. Place a thermometer in your mixture.
  4. Weigh the soda in a glass or plastic container with a spout.
  5. Pour the soda gradually into the water and ice cubes (never the other way round, especially not the water into the soda) while stirring so that the soda dissolves completely. Take the temperature of the mixture.
  6. Once the two mixtures are at the right temperature (35-40°): pour the soda solution into the vegetable oil solution and mix with a hand blender.

Then follow the same steps as for method 1.

Our recipes

Our selection

You might also like

All our articles